Thanks for stopping by! I hope this finds you happy and healthy.
Showing posts with label Gifts. Show all posts
Sunday, August 25, 2013
Gift for Teacher
So tomorrow is the day (WOOHOO!) and the kids always take a little something for their teacher on the first day of school. We like to try and start off on the right foot and gifts are a good way to pave the path. :) This year we picked up these memo cubes from Staples. I made the cards, you saw those in an earlier post HERE (and can get the details there). Hopefully, Teacher likes it!
It's going to be a great year!
Thanks for stopping by! I hope this finds you happy and healthy.
Tuesday, July 23, 2013
Happy Birthday, Whitney!!!
My precious goddaughter turns THREE today! I can hardly believe it! My BFF, LT, gave birth to her the day before my oldest turned four. I was hoping they would share a birthday but it's close enough. :) I was able to meet Whitney the next day (after all of our birthday party guests left) and I've been in love every since.
This year, I decided I would make her a mini. I haven't made one specifically for her and I thought she was probably old enough to at least give it a try. I didn't use any big embellishments just in case the temptation became to great and they were pulled off or sucked on or whatever. All the embellishments I did use are made of paper so even if they do come off, they shouldn't be toxic if nibbled. If you would rather, you can watch the VIDEO HERE.
I started with DCWV's Celebration stack. LOVE this paper! It's so colorful and it's easy to turn it into a girl birthday or a boy birthday (will show that mini in the future :)). I used kraft cardstock and a tutorial by Chandra at YT: SuperHappyScrapper. I grabbed chipboard letters from my stash and the purple matched perfectly. I didn't want then to be too distressed but I had to remove the little bits that attached to the bigger page. I think they came out all right.
I had to put tape on the binding because my paper started ripping. I made the spine a little too small. This also makes this book not close very well.
I had fun using all the colorful, glittered/foiled papers throughout.
I tried to keep my tags clean and simple as not to add any more bulk to the book and because I wanted Whitney to be able to manipulate them herself. I also wanted LT to be able to add lots of pictures and journaling.
A card I made out of the colorful scraps. Couldn't let those go to waste. :)
A few more little details...
I hope you like it, Whitney! We love you so very much and hope to see you soon! Happy Birthday!!
I hope this finds you happy and healthy!
This year, I decided I would make her a mini. I haven't made one specifically for her and I thought she was probably old enough to at least give it a try. I didn't use any big embellishments just in case the temptation became to great and they were pulled off or sucked on or whatever. All the embellishments I did use are made of paper so even if they do come off, they shouldn't be toxic if nibbled. If you would rather, you can watch the VIDEO HERE.
I started with DCWV's Celebration stack. LOVE this paper! It's so colorful and it's easy to turn it into a girl birthday or a boy birthday (will show that mini in the future :)). I used kraft cardstock and a tutorial by Chandra at YT: SuperHappyScrapper. I grabbed chipboard letters from my stash and the purple matched perfectly. I didn't want then to be too distressed but I had to remove the little bits that attached to the bigger page. I think they came out all right.
I had to put tape on the binding because my paper started ripping. I made the spine a little too small. This also makes this book not close very well.
I had fun using all the colorful, glittered/foiled papers throughout.
I tried to keep my tags clean and simple as not to add any more bulk to the book and because I wanted Whitney to be able to manipulate them herself. I also wanted LT to be able to add lots of pictures and journaling.
A card I made out of the colorful scraps. Couldn't let those go to waste. :)
A few more little details...
I hope you like it, Whitney! We love you so very much and hope to see you soon! Happy Birthday!!
I hope this finds you happy and healthy!
Saturday, July 20, 2013
Friday, June 21, 2013
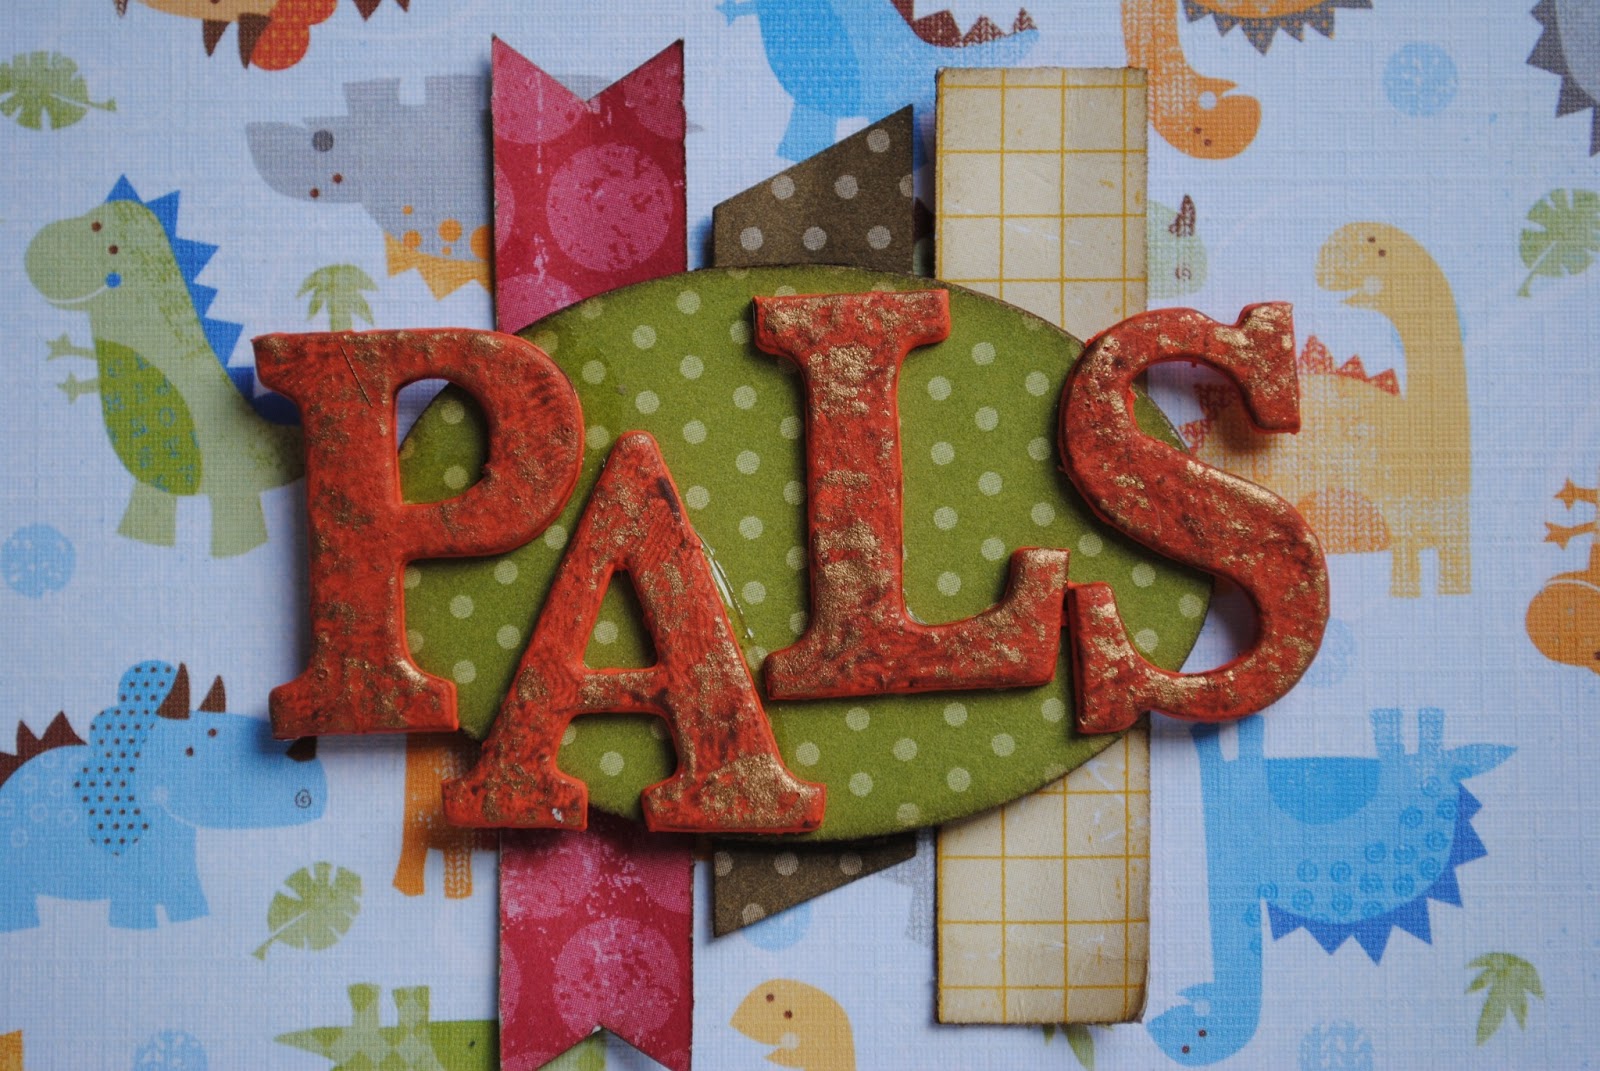
Pals Mini Album
I made this mini album from the Baby Saurus envelope kit by Little Yellow Bicycle. I have had it awhile because, when I bought it Archivers, I didn't notice that the chipboard covers were WAY too small for the envelopes. Realizing it was too late to return them to the store, I set the too-small covers to the side, made my own, and finished the mini. I made this for our cousin in Wisconsin that we visit every summer. Thought it would be fun to put pictures of his toys or him and his toys or him and friends (or us!) or really whatever. I didn't do a whole lot of embellishing (or really any embellishing) because I didn't want there to be little pieces possibly coming off and into little hands.
I did, however, paint and distress the letters for the title. Still not sure if I like them. First I covered them in a custom orange I mixed from acrylic paints. That was too bright and didn't match like I wanted in to. So I added brown paint with my finger in small swipes. They still needed something so I repeated the step with Antique Gold Rub'N'Buff. Wiped off as much as I could and there is the final product.
I also created the title layers with some left over Stampin' Up Simply Stampin' Kit (that I have no idea what the name was) scraps. Roughed them up a little by carefully crumpling and then smoothing out. I also only adhered them in the center so that the ends would stand up from the cover a bit. I punched five ovals from kraft cardstock, along with one from the scraps of design paper and glued them together, creating a little dimension.
I inked the hole reinforcers (came with the kit) with Shabby Shutters and Peeled Paint Distress Inks.
Thanks for stopping in! Hope this finds you happy and healthy.
I did, however, paint and distress the letters for the title. Still not sure if I like them. First I covered them in a custom orange I mixed from acrylic paints. That was too bright and didn't match like I wanted in to. So I added brown paint with my finger in small swipes. They still needed something so I repeated the step with Antique Gold Rub'N'Buff. Wiped off as much as I could and there is the final product.
I also created the title layers with some left over Stampin' Up Simply Stampin' Kit (that I have no idea what the name was) scraps. Roughed them up a little by carefully crumpling and then smoothing out. I also only adhered them in the center so that the ends would stand up from the cover a bit. I punched five ovals from kraft cardstock, along with one from the scraps of design paper and glued them together, creating a little dimension.
I inked the hole reinforcers (came with the kit) with Shabby Shutters and Peeled Paint Distress Inks.
Thanks for stopping in! Hope this finds you happy and healthy.
Monday, June 10, 2013
Meg's Mini Album
My BBF just graduated nursing school last month! Woot woot, for Megan! I am so very proud of her and I wanted to make her a mini album to keep all those special things that she has or will collect over her time as a nurse. We all need a happy place and hope that that is what I have created for her. I do remember from the work place, getting those random pictures and thinking, "I love it but where to keep/display it?" That was the job I was giving to this gift. Now, whatever she decides to do with it is completely okay with me but we've got to start with a plan, right?
I used My Mind's Eye (MME) The Sweetest Thing paper collection and the 'Lavender' papers and embellishments from within that collection. All edges are inked with Brushed Corduroy distress ink. I used Kathy Orta's Build-a-Page mini album. Love it! So many ways to customize. You can see the video HERE.
Couldn't be more proud of her. Hope this finds you happy and healthy.
(Thanks for letting me watch you go through this journey, Megan. I love you.)
I used My Mind's Eye (MME) The Sweetest Thing paper collection and the 'Lavender' papers and embellishments from within that collection. All edges are inked with Brushed Corduroy distress ink. I used Kathy Orta's Build-a-Page mini album. Love it! So many ways to customize. You can see the video HERE.
Couldn't be more proud of her. Hope this finds you happy and healthy.
(Thanks for letting me watch you go through this journey, Megan. I love you.)
Tuesday, June 4, 2013
Summer Mini 2013
I made these minis for some extra special friends in my YT world that have really stood by me through the last 2 years. I've had some difficulty and I know that no matter how much time has passed, I can call (or text more likely) either one of these ladies and it's like not a day has passed.
Some of the materials used are DCWV's Sunday Afternoon Stack, Tim Holtz Walnut Stain distress ink, and kraft cardstock. I used a file folder tutorial from Michelle at ThePaperAddiction. I kept these simple because I want the ladies to be able to add their beautiful touches and really make it their own. I was able to create two full mini albums and then a "mini" mini album with the scraps left over. I still have HALF of the stack left! :) You can see the VIDEO HERE.
Summer Mini 1:
Summer Mini 2:
Summer Mini 3:
Don't know yet what I will be doing with the little one yet but I'm sure I'll find something.
Hope this finds you happy and healthy!
Some of the materials used are DCWV's Sunday Afternoon Stack, Tim Holtz Walnut Stain distress ink, and kraft cardstock. I used a file folder tutorial from Michelle at ThePaperAddiction. I kept these simple because I want the ladies to be able to add their beautiful touches and really make it their own. I was able to create two full mini albums and then a "mini" mini album with the scraps left over. I still have HALF of the stack left! :) You can see the VIDEO HERE.
Summer Mini 1:
Summer Mini 2:
Summer Mini 3:
Don't know yet what I will be doing with the little one yet but I'm sure I'll find something.
Hope this finds you happy and healthy!
Wednesday, May 15, 2013
Mother's Day Mini
This mini is more functional than fun, though its fun too. I made this for my mom who is an avid card maker. I saw this stamp set on tshernjpan YouTube video and knew immediately I had to have it. The set is Papertrey Ink's Desktop File. I used the left over scraps from my mother-in-law's mini (see previous blog). I glued all the strips down and then cut the paper to size. I inked the edges with Black Soot Distress ink and the images are stamped with Stampin' Up black ink. The pages are index cards and I used an entire package. You can see the mini in its entirety HERE.
I was thinking that I might check into the PTI's Angel Policy and see about offering this book in my Zibbet shop. What do you think? I know a couple of crafting friends who will be receiving one for their special day but I thought it would be fun for others to have excess if you can't get the stamp set yourself. Let me know what you think about that idea.
Thanks so much for your time! See you soon. (Oh, and I'm on FaceBook now, Happy Chick Designs LLC)
I was thinking that I might check into the PTI's Angel Policy and see about offering this book in my Zibbet shop. What do you think? I know a couple of crafting friends who will be receiving one for their special day but I thought it would be fun for others to have excess if you can't get the stamp set yourself. Let me know what you think about that idea.
Thanks so much for your time! See you soon. (Oh, and I'm on FaceBook now, Happy Chick Designs LLC)
Subscribe to:
Posts (Atom)